Peak Electronic Design Limited Home Page   Products   Custom design services etc   Latest Peak News   Product Support   Find a distributor near you   Links   Contact Us   View your cart or proceed to checkout  
EDDI Support Page: The Peak Eddi - Model EDD03 PC Companion Software

EDDI Battery Replacement
  Remove the rear cover:  
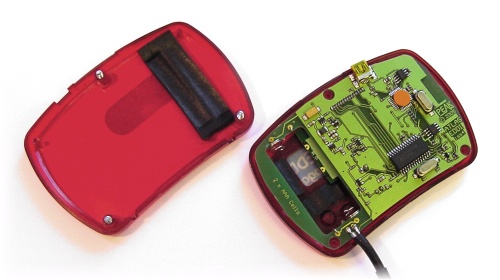
Remove rear cover of Eddi.
Place your EDDI face down on a flat surface and unscrew the three screws. The rear panel should come off fairly easily, taking care to ease the temperature sensor cable out of the slot on the rear cover as you lift it off. Then remove the two exhausted batteries and discard. If necessary, ensure the EDDI electronics assembly is nicely resting in the front cover as shown above, this is important to help prevent the button covers falling out as you try to reassemble EDDI.

Insert the first battery:
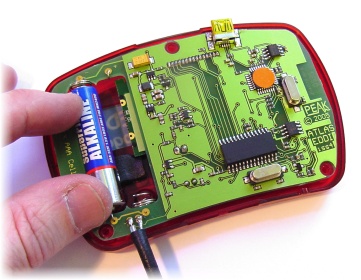
Insert the first AAA battery. With the EDDI electronics firmly resting in the front cover, insert the first AAA battery as shown above. Ensure that the positive end of this battery (the tip) is pointing towards the temperature sensor cable and is comfortably resting against the small electrical contact.

Insert the second battery:
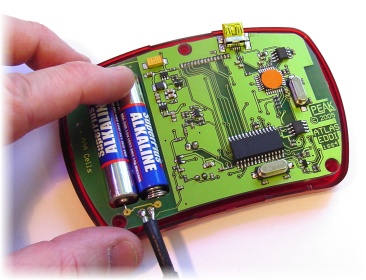
Insert the second battery. Now insert the second battery, this time, the other way round, it's positive tip pointing towards the top of the unit. Again, ensure that the tip is comfortably seated against the small silver electrical contact.

Replace the rear cover:
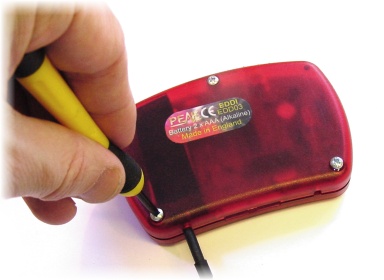
Fasten the rear cover. Without disturbing the batteries (the supporting foam under the batteries tends to make the batteries want to "pop" out), carefully place the rear cover onto the whole assembly. Take care to ensure the temperature sensor cable is neatly nestled in the small slot. While pressing down fairly firmly on the rear cover, fasten the three screws. The foam in the rear cover will firmly hold the batteries in place. Turn your EDDI over and check that it is operational. If it appears dead, wait for a few minutes, it may be busy re-initialising it's log memory, then press a button to wake it up.
EDDI Companion PC Software
  Double click on the EDDI icon in your system tray (the area near your clock),  click on Help and select About.
You will see the PC software version date shown in small white text starting with "r", the date is in the format of
dd-mm-yy.

The latest release is r030710, if yours is older then we suggest you get the latest version to ensure the best possible EDDI functionality.

Eddi PC Software version number  
EDDI Setup Key updated areas:
Corrected a problem when transferring minus temperature values to the PC. Added Windows 2000 support. Added experimental support for Office 2007/2010.
If you are updating an existing installation, there is no need to uninstall your current software. Please ensure that your have quit the companion software by right-click on the EDDI icon in your system tray and selecting Exit. Also, you may ignore the instructions regarding USB driver installation if you already have a working installation.
Full EDDI CD (including USB Drivers for Eddi)
  We highly recommend that you closely follow the simple driver installation procedure that is shown in the EDDI printed user guide in conjunction with the supplied CD.

Download the file below, extract the files and then write them to a blank CD. 

 
Eddi CD Key updated areas:
Corrected a problem when transferring minus temperature values to the PC. Added Windows 2000 support. Added experimental support for Office 2007/2010.
The installation process will place the USB driver files into a folder, normally: "C:\Program Files\EDDI". If instructed to do so, direct the "Found New Hardware Wizard" to this folder.
Peak EDDI - Downloads
  Data Sheet User Guide  
Site Designed by Jez Siddons and Joe Wood, Copyright Peak Electronic Design Limited - E&OE
Credit and Debit Cards Welcome Streamline Merchant Card Services Secure Space Credit Card Checkout Actinic Hosted Secure Credit Card Server Actinic Catalogue